

Quick things to try
- Stop and resume transcription — Open the meeting note. Click Stop next to the green audio bars, wait a moment, then click Resume.
- Check the transcript — Open the transcript and see which side is missing: green bubbles are your microphone; grey bubbles are other people on the call. If your microphone isn’t being transcribed, check that the right microphone is selected.
- Restart Granola — This resets the connection to our transcription servers.
- Mac: Right-click the Granola icon in the Dock and choose Restart Granola. You can also choose Restart Granola from the Granola menu in the menu bar.
- Windows: Click the ^ icon in the bottom-right of the taskbar, right-click the Granola
gicon, and choose Restart Granola.
- Restart your computer — If restarting Granola doesn’t help, restart your computer. The processes that capture system audio can get stuck, and a full restart clears them.
- Check your internet connection — Open speed.cloudflare.com and run a speed test. A slow, unstable, or filtered connection can stop transcription even when the rest of the web still loads.
Why transcription might not be working
If those steps don’t fix it, Granola is usually failing in one of two ways:- It can’t connect to our transcription servers — nothing is transcribed, or transcription starts then stops. In this case, you’ll usually see an orange warning saying that Granola is having trouble transcribing.
- It can’t capture audio, or it’s capturing the wrong audio — one side of the conversation is missing, or the transcript stays empty even though you can hear the call.
Can’t connect to transcription servers
Transcription needs a live connection to our transcription providers. VPNs, proxies, firewalls, and web filtering tools can block this even when other websites work.- In the Granola app, click your workspace name in the bottom-left corner, then select Settings. Open Settings > Troubleshooting.
- Select Run check under Network connectivity.
- Follow the troubleshooting steps shown in the app. You can copy a report for your IT team if the check fails.
Audio capture
Granola needs to use the same audio devices as your meeting app (Google Meet, Teams, Zoom, and so on). In most cases it selects those devices automatically. If it doesn’t, the transcript will be missing one side of the conversation.Check which channel is missing
Open the transcript (the waveform bars on the note):- Green bubbles (right) are from your microphone — that’s you, and anyone else in the same room.
- Grey bubbles (left) are from your computer’s system audio — that’s other people on the call in your meeting app.
Change the microphone Granola uses
You can change the microphone Granola uses in the transcript window. Open the transcript, then choose a microphone from the list at the bottom. Auto follows your meeting app’s microphone when one is open. Otherwise it uses your system default. If the wrong mic is selected, pick the same one your meeting app is using.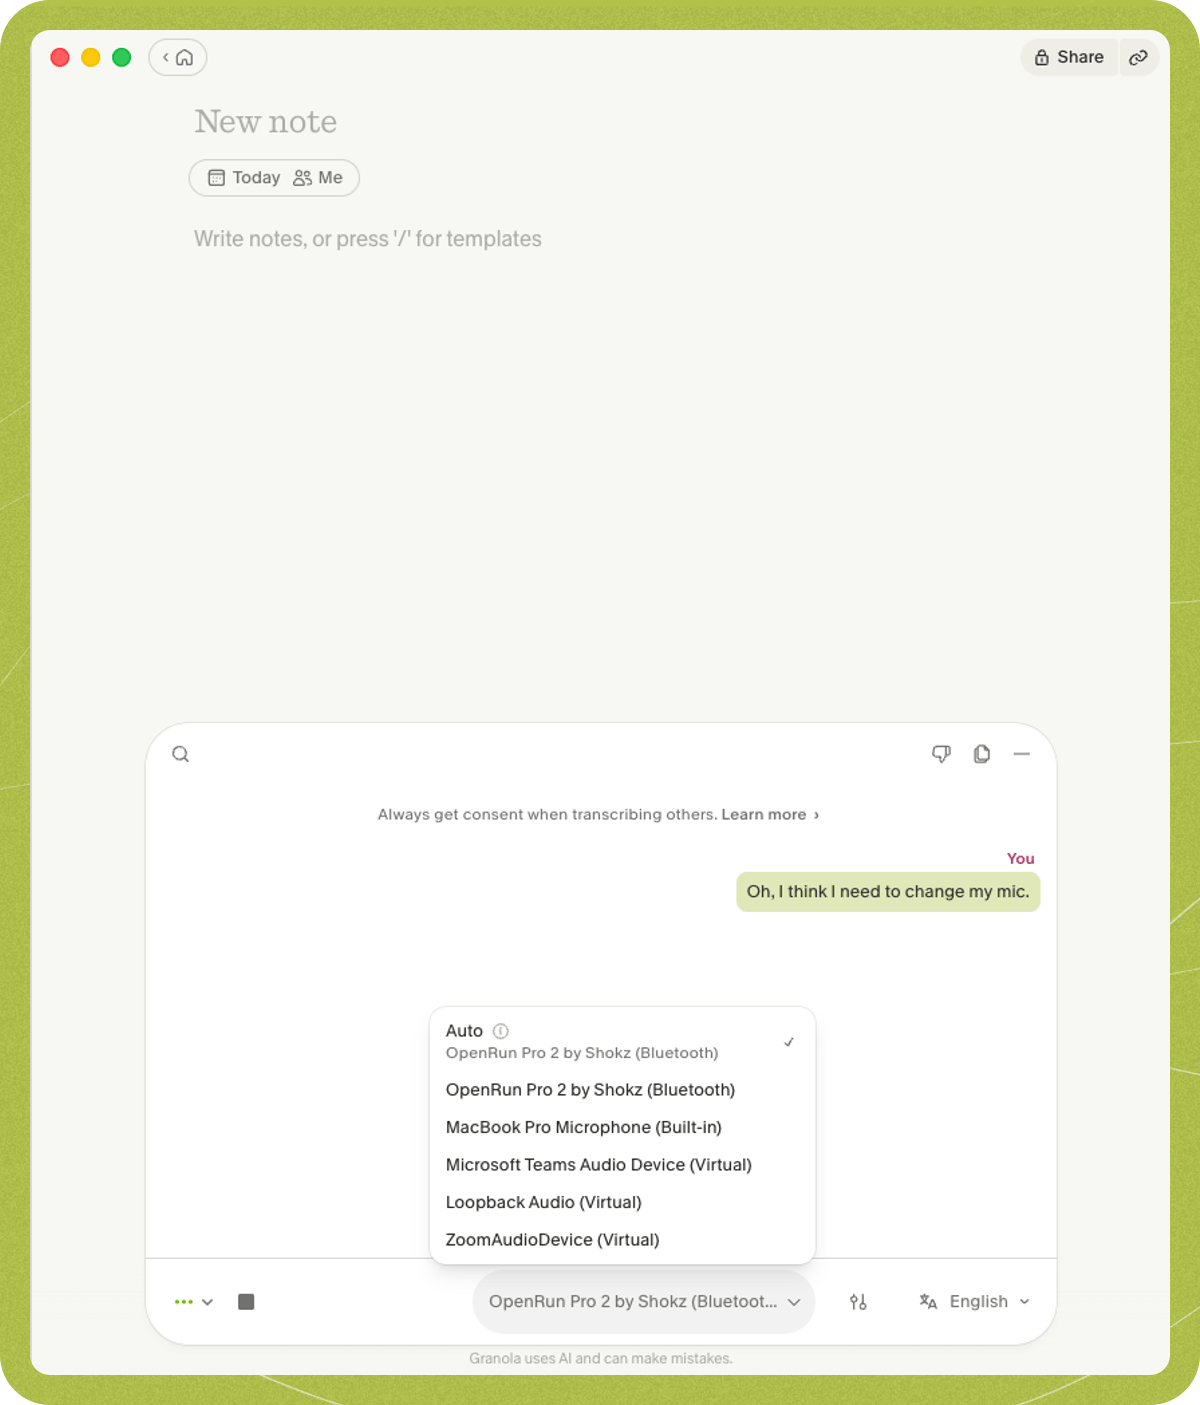
Windows: meeting apps we don’t support yet
On Windows, if you’re using a meeting app we haven’t added support for yet, sound from other people on the call may not be picked up. Your own voice can still appear in the transcript. If you notice this, get in touch and tell us which app you’re using.Antivirus software (Windows)
Kaspersky antivirus or endpoint protection can block Granola from using your audio devices. When this happens, you’ll see:We’re having trouble transcribing. Your antivirus software may be blocking Granola.Allow Granola to access your microphone and audio devices in Kaspersky. See Kaspersky’s guide on allowing application access to audio devices. After you’ve allowed Granola, restart Granola and try transcribing again. If it still doesn’t work, restart your computer so Kaspersky reloads the permission.
Check permissions
Granola needs permission to use your microphone (and, on Mac, system audio):- Mac: System Settings > Privacy & Security > Microphone, and Screen & System Audio recording — both must be on for Granola.
- Windows: Settings > Privacy & security > Microphone — turn on microphone access, and turn on Let desktop apps access your microphone.