

What are workspaces?
Granola organizes your work into workspaces — a home for your notes, spaces, folders, and meeting insights. You can create a personal workspace just for yourself, join your company’s workspace to collaborate with your team, or have both to keep work and personal notes separate. Personal vs business/team accounts: There isn’t a separate “account type” — the difference is whether the workspace is only you (personal) or has multiple members (team). Same Granola account can own or belong to both. Billing applies per workspace: a personal workspace can be on the free plan while your company workspace is on Business, or the other way around. See Subscriptions and billing and Can I upgrade just myself? below. Workspaces aren’t yet supported on the Granola iOS app. Meeting notes will be added to your oldest workspace by default and can be moved between workspaces via our desktop app by following the steps at the bottom of this article.Using a personal workspace
A personal workspace is perfect if you want to keep your notes and meeting insights private and organized just for you. Your personal workspace gives you:- Private notes by default - everything stays private unless you choose to share
- Granola Chat - search and ask questions across all your notes and transcripts to quickly find information
- Your own organization - create folders within your spaces, templates, and recipes that work for your workflow
- Full control - you’re the admin of your own workspace
Collaborating in a team workspace
A team workspace is perfect if you want to collaborate with colleagues while keeping control over what you share. Your team workspace gives you:- Private notes by default - everything stays private unless you choose to share
- Shared notes and folders - organize notes into your team space for standups, retros, customer calls, and more
- Templates and recipes for your team - create and share templates and recipes with teammates to standardize note formats and meeting follow-ups
- Granola Chat - search and ask questions across all your notes and transcripts to build a shared knowledge base
Privacy of your notes
Your notes are never shared by default - they’ll remain private unless you choose to share them by adding them to a folder in your team space, or share them directly with someone else.Getting started
Creating a workspace
When you first set up Granola, you can create a workspace by choosing a name and picture for it. You can always add additional workspaces later by clicking your workspace name in the bottom-left corner of the Granola desktop app and selecting ‘Add workspace’ from the menu. When creating a workspace, you’ll be asked to choose a workspace name and can optionally allow teammates with the same email domain to auto-join. If you’d prefer this to be a personal workspace, we recommend making sure the auto-join checkbox is unchecked.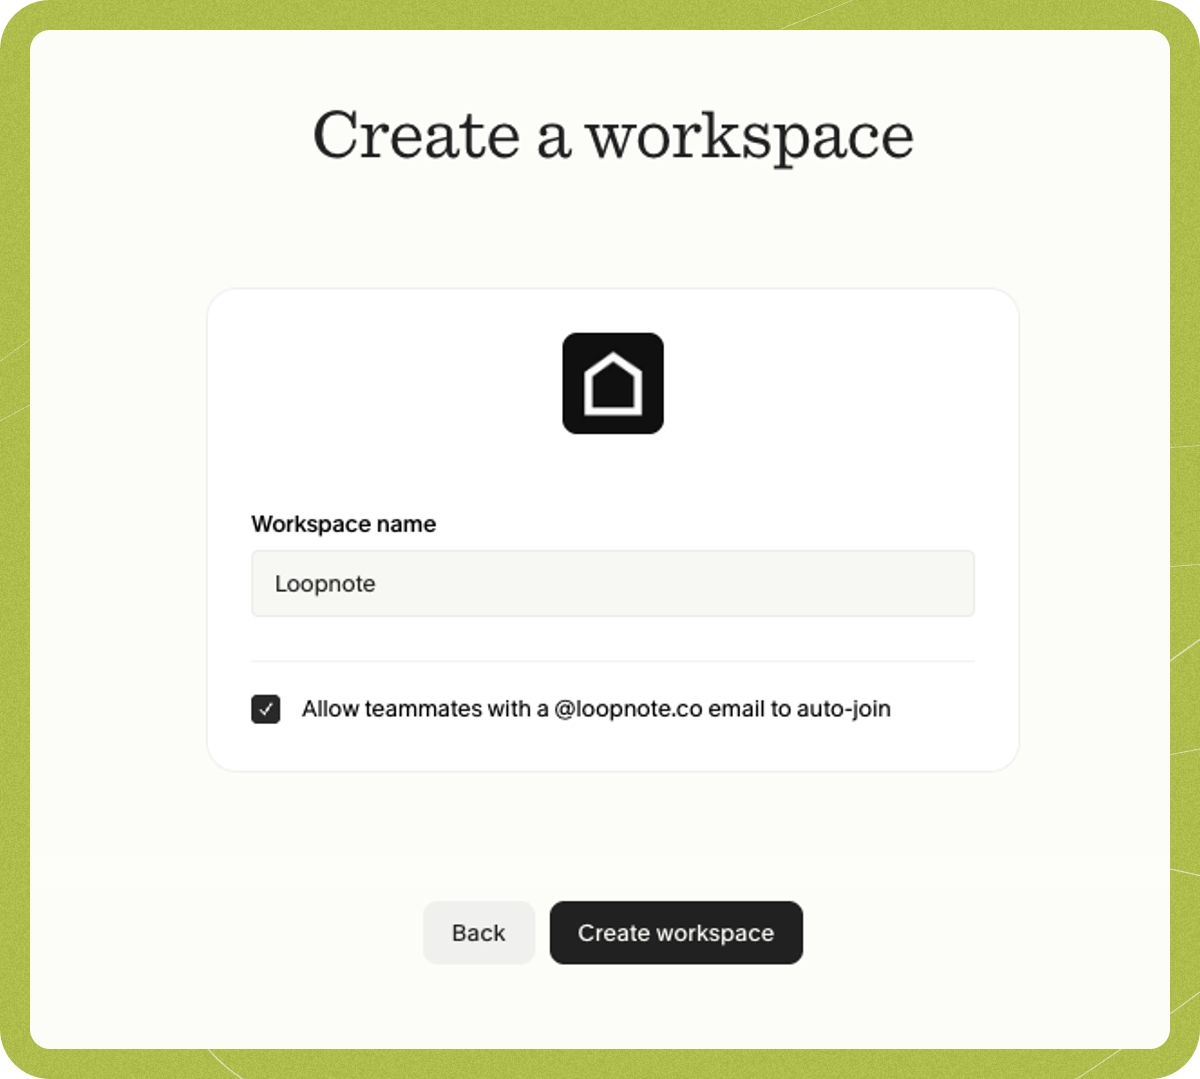
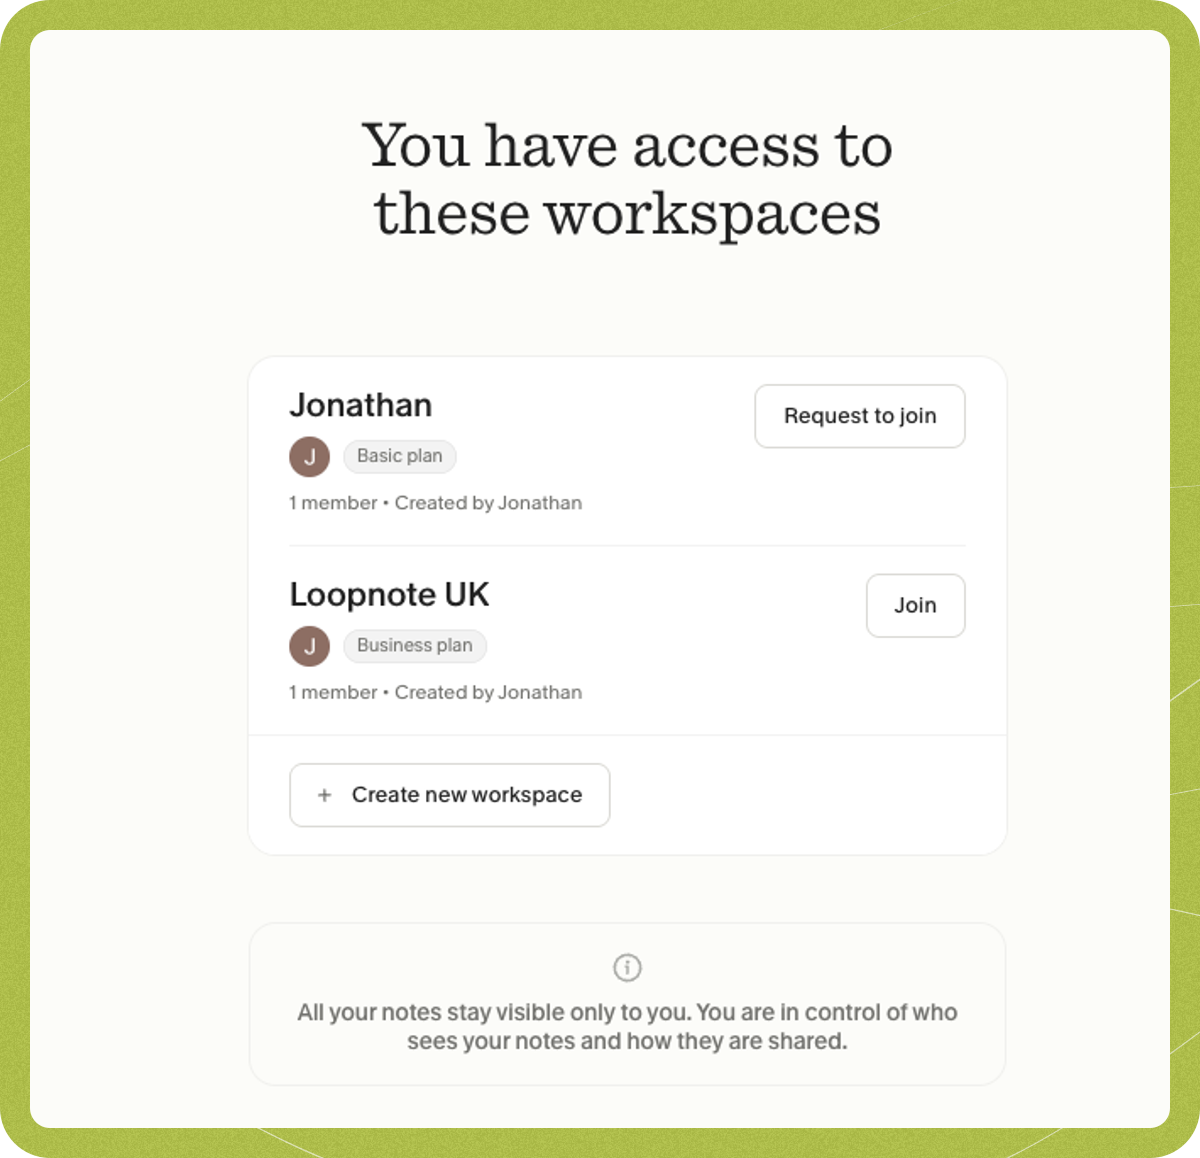
Joining an existing team workspace
If your company already has workspaces created, you can join an existing one - or send a request to the admins to join any private workspaces. You’ve also got the option to create a new workspace for your team. By joining a workspace, you’re agreeing to the Terms of Service. When you accept an invite or join a new workspace, Granola switches you to that workspace by default. Your existing notes stay in your original workspace — they are not moved or deleted. To view them, switch back to your original workspace by clicking the workspace name in the bottom-left corner of the Granola desktop app and selecting your original workspace from the list.Switching between workspaces
Click the workspace name in the bottom-left corner of the Granola desktop app to see a list of all workspaces you belong to. Select any workspace to switch to it.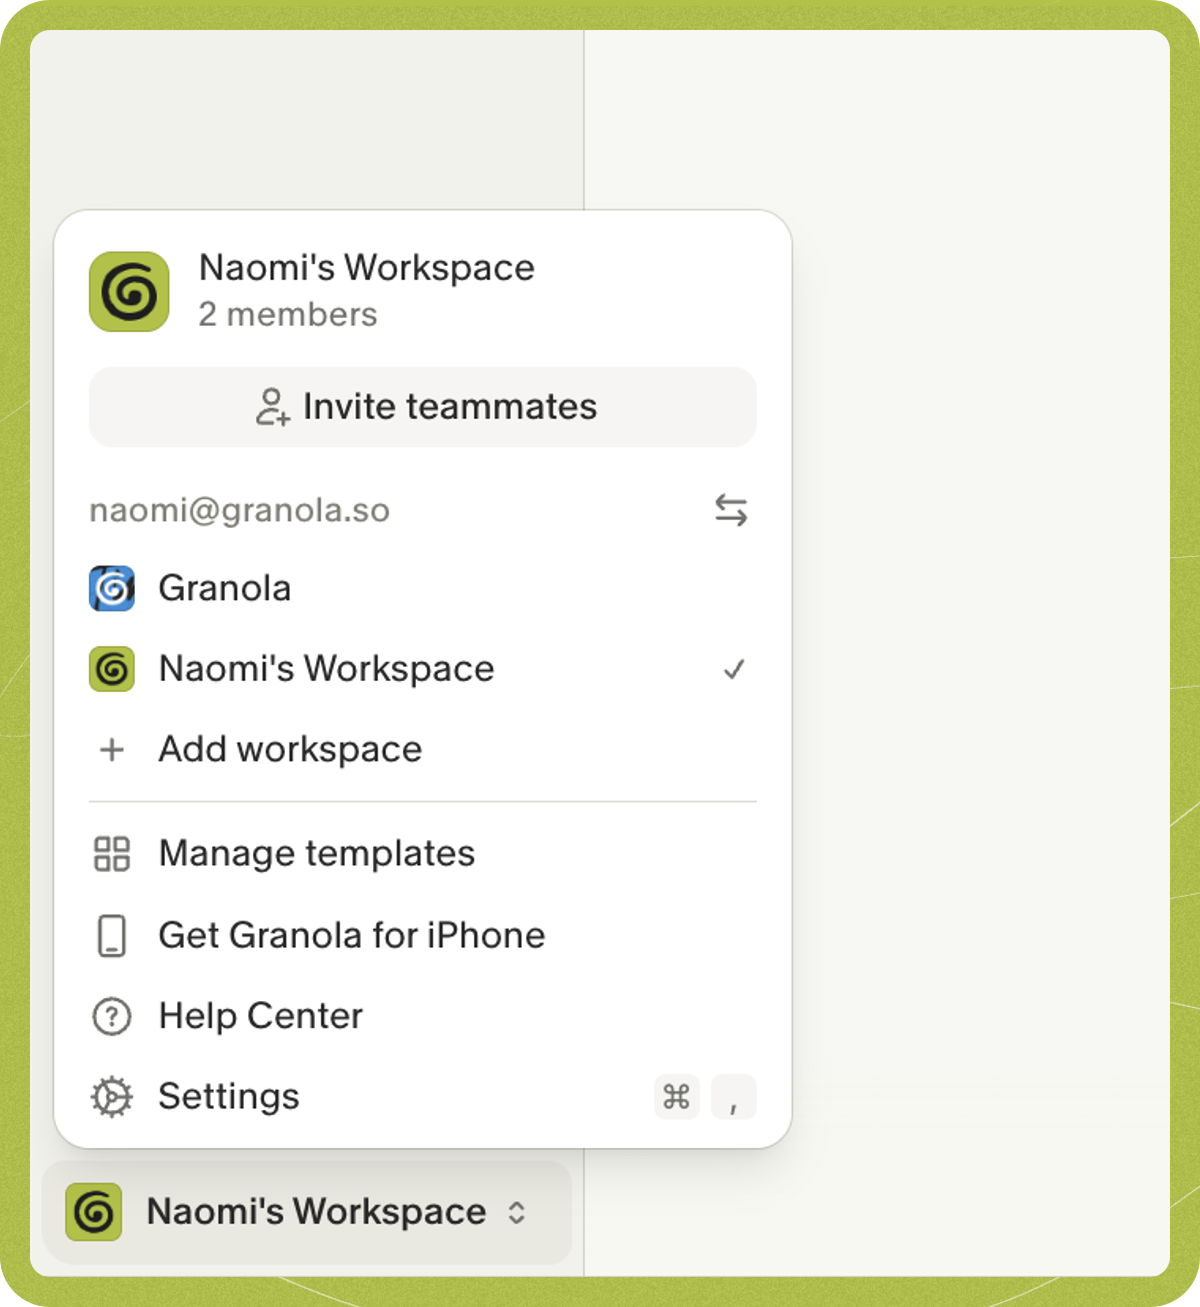
Inviting teammates to a workspace
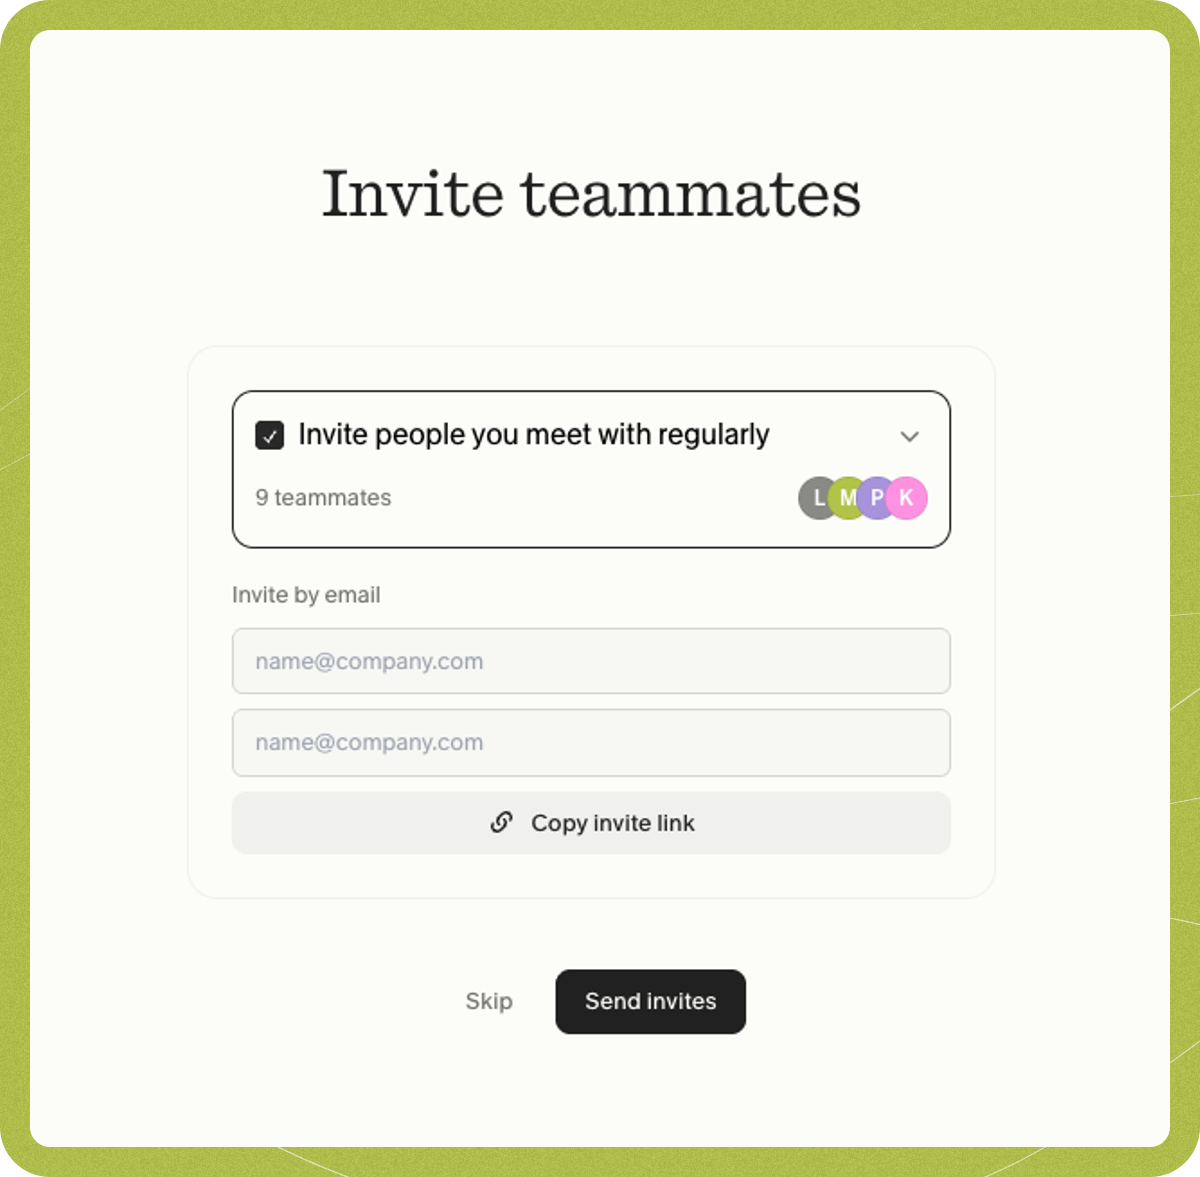
When creating a workspace, you can invite teammates by entering their email addresses or selecting people you meet with regularly. This list is created from anyone at your company who you’ve previously had a Granola meeting with.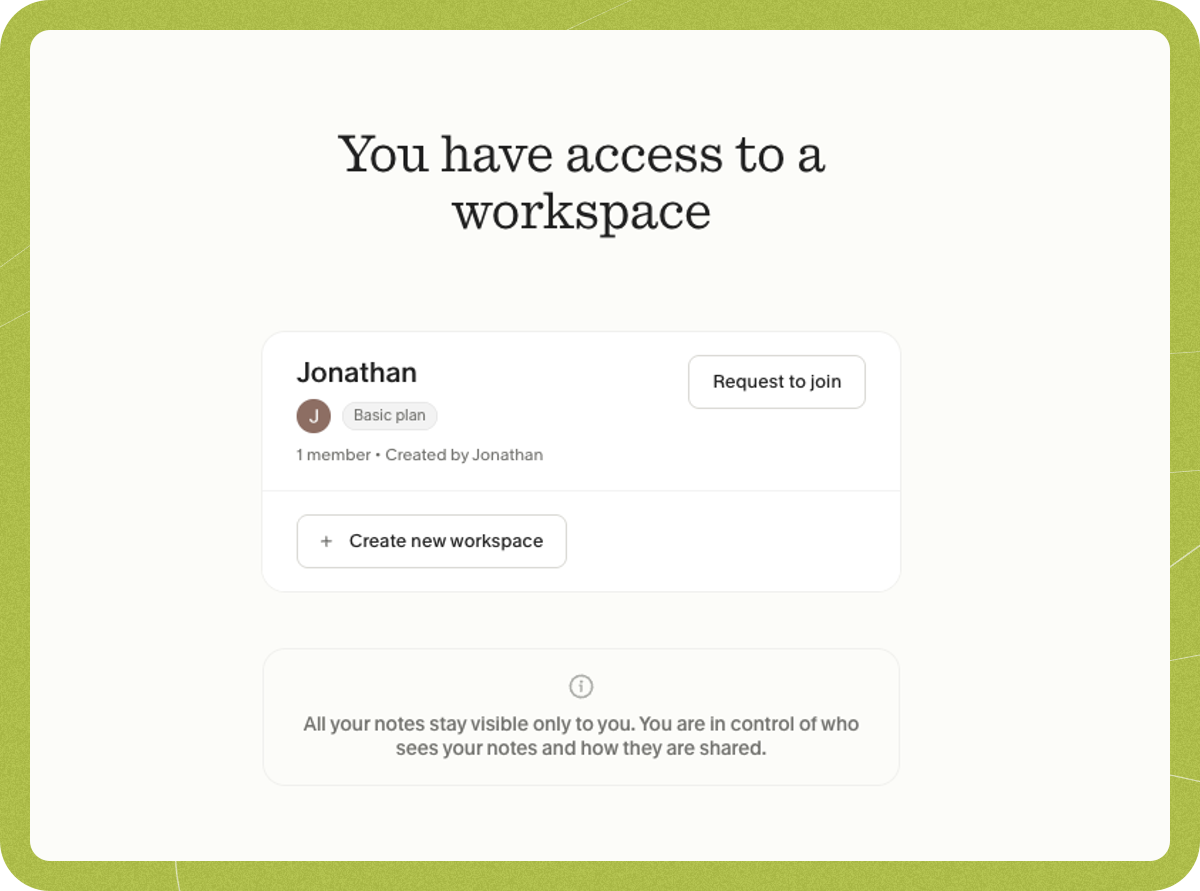
- View and manage team members — See who’s in the workspace, their role (Admin or Member), and remove members if needed.
- Change roles — Promote a member to Admin or change an Admin to Member. Admins can manage workspace settings, billing, and team. Members can use the workspace and view the billing page and upgrade the workspace, but cannot manage existing subscriptions (such as canceling, changing plans, or updating payment methods) or change workspace and team settings.
- Copy invite links — Share a link so others can join the workspace (subject to any domain auto-join rules).
- Invite new teammates — Add people by email or from a list of people you’ve had meetings with. On a paid plan, each new member adds a seat and increases the next bill (prorated).
Removing people from your workspace
As a workspace admin, you can remove teammates in the Team section of Granola settings - find them in the list of Team members and then click the dropdown next to their name to select “Remove”.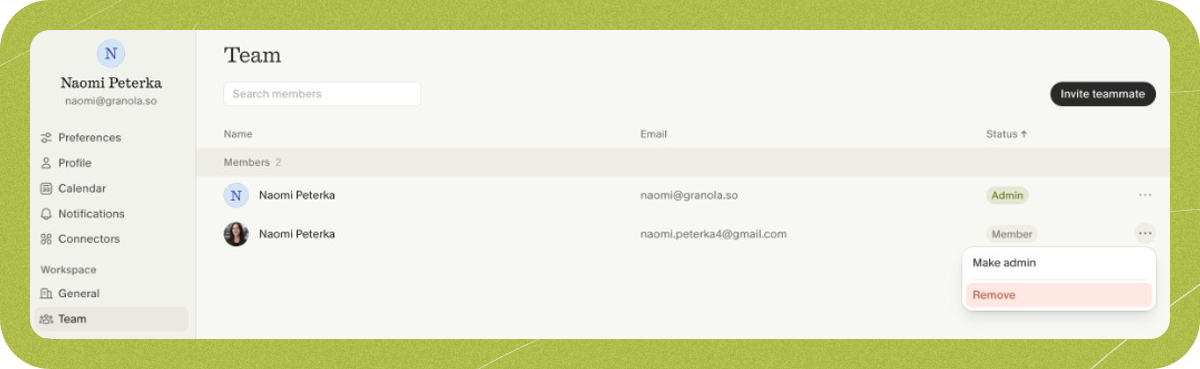
Leaving a workspace
To leave a workspace:- Go to Settings > Workspace > General
- Scroll down to the Danger zone section
- Click Leave workspace
- Confirm by typing “Leave [workspace name]” when prompted
Moving notes between workspaces
You can move notes between workspaces you are a member of. To do this, click on the 3 dots that appear when you hover over a note, select ‘Move to workspace’ and click on the workspace you’d like to move the note to.Workspace settings
Workspace admins can control various workspace settings, including whether notes can be moved between workspaces. To access these settings, go to Settings > Workspace > General.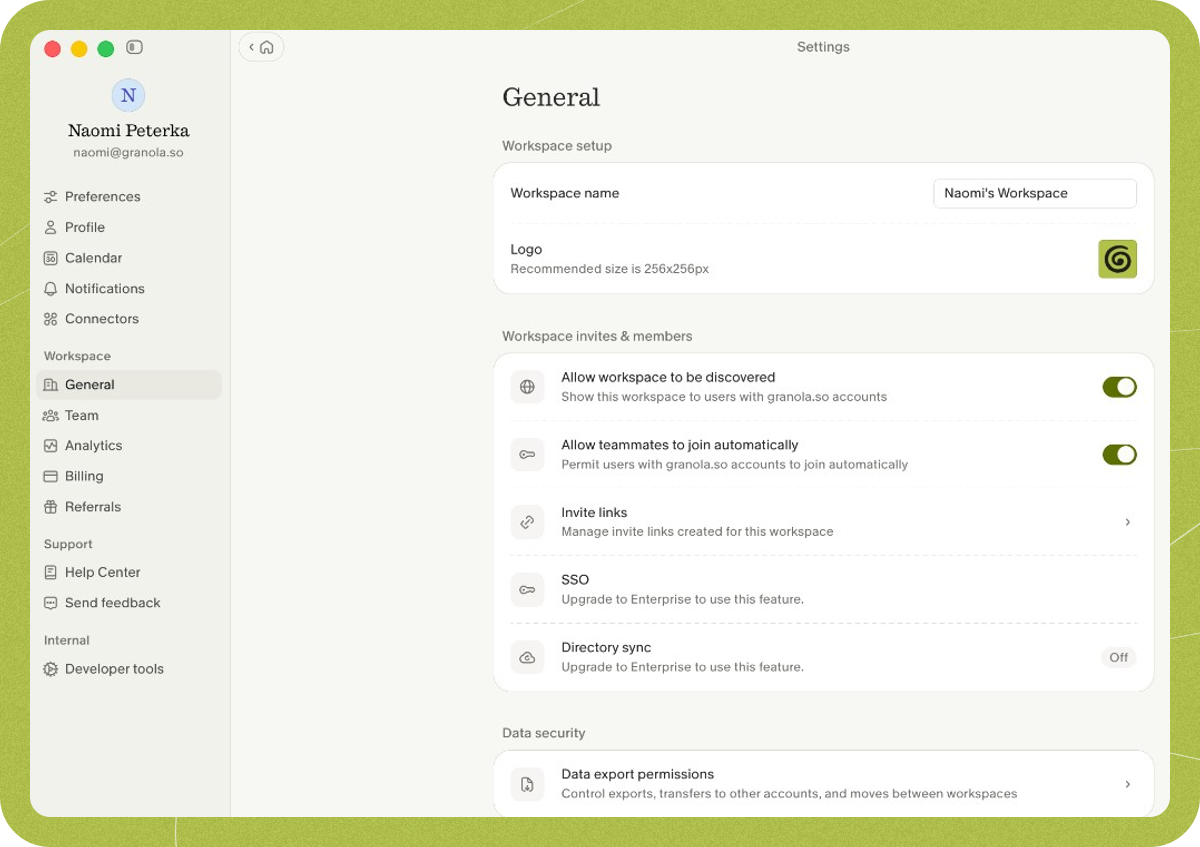
- Workspace name - Edit the workspace name at any time by updating the “Workspace name” field under Workspace setup and clicking away to save
- Workspace logo - Change the workspace logo by clicking on it under Workspace setup
- Allow teammates to join automatically - Permit users with matching email domains to join the workspace without requesting access
- Data export permissions - A sub-page (under Data security) where admins can control whether users can export data from the workspace, transfer notes to another account, or move notes to another workspace
- Allow workspace to be discovered - Show/hide this workspace to users with matching email domains when they are selecting a workspace to join
Transfer notes
To move all your notes to a different workspace, go to Settings > Workspace > General and use the “Transfer notes to another workspace” option in the Danger Zone section. This will move all your notes from the current workspace to another workspace you’re a member of. Workspace admins have a setting to allow/prevent moving notes between workspaces - but it’s your responsibility to make sure you have permission to move notes between workspaces based on your company policies. To move all notes into a workspace (in bulk), you can follow this guide here.Deleting a workspace
If you no longer need a workspace — for example, after migrating to a new one — admins can delete it from the Danger Zone in workspace settings. Deleting a workspace is permanent and removes all associated data. Before you can delete a workspace, the following requirements must be met:- Transfer your notes — Move any notes you want to keep to another workspace first (Settings > Workspace > General > Danger Zone > Transfer notes). Once the workspace is deleted, all notes in it are permanently lost.
- Remove all other members — All other members must leave or be removed from the workspace. Only a workspace with a single remaining member can be deleted.
- Cancel any active subscription — If the workspace has an active paid subscription, cancel it before deleting. You can manage your subscription from Settings > Billing.
- Delete the workspace — Once the above steps are complete, go to Settings > Workspace > General > Danger Zone and click Delete workspace. You’ll be asked to type the workspace name to confirm.
Can I upgrade just myself without upgrading my whole team?
Yes. Upgrading is per workspace, not per whole company. If you’re in a workspace that’s on the free plan and you want Business features (unlimited note history, integrations, thinking models) for yourself only:- Create a new workspace (workspace name in bottom-left > Add workspace) and name it e.g. “My workspace”.
- Transfer your notes from the current workspace to the new one: Transfer notes to another workspace (Settings > Workspace > General > Danger Zone), or move notes one by one with Move to workspace on each note.
- Subscribe in the new workspace — In the new workspace go to Settings > Billing > Manage subscription and subscribe to Business. You’ll be the only member and only pay for one seat.
- (If you’re the admin of the old workspace) Nominate another admin or hand off before leaving, then leave the old workspace if you no longer need it.
Creating and upgrading a new personal workspace
If you want to move to a personal workspace or upgrade to a business plan without paying for everyone in your current workspace, follow these steps:- Set up a new workspace - Click your workspace name in the bottom-left corner of the Granola desktop app and select ‘Add workspace’ to create a new workspace
- Transfer your notes - Switch back to your existing workspace, and move your notes to your new workspace by going to Settings > Workspace > General > Transfer notes (as described above)
- (If you’re the admin) Nominate a new admin - If you’re the admin of the workspace you’re leaving, make someone else an admin via the Team settings within the Granola desktop app before you leave
- Leave the old workspace - Once your notes are safely transferred and a new admin is in place (if needed), you can leave your old workspace