

Quick troubleshooting checklist
Before diving into the sections below, run through this list:- Restart Granola — Right-click the Granola icon in the dock (Mac) or system tray (Windows) and choose “Restart Granola”.
- Match audio devices — Your system’s default microphone and speaker (or default communications device on Windows) must be the same ones your meeting app (Meet, Teams, Zoom, etc.) is using. See Match system audio with your meeting audio below.
- Check permissions — On Mac: System Settings > Privacy & Security > Microphone and Screen & System Audio recording must be enabled for Granola. On Windows: Settings > Privacy > Microphone — make sure “Let desktop apps access your microphone” is turned on.
- Bluetooth and external audio — Granola captures your system’s default audio. If you use Bluetooth headphones or external speakers, set them as the default (and default communications) device in system sound settings. Some Bluetooth or USB devices can cause dropouts; if transcription stops after a few minutes, try built-in audio or a different device.
- macOS version — Granola requires macOS 13 or later, but works best on macOS 14.2 or above. If you’re on an older version, updating macOS may resolve transcription problems. You can check your version in Apple menu > About This Mac.
- Language — If notes or transcript appear in the wrong language, check Language settings and ensure your meeting language is selected. Transcription uses the language you’ve set for your account/workspace.
Testing if Granola is able to transcribe your meetings
To test if transcription is set up correctly:- Open our demo meeting video
- Click “Quick Note” in Granola
- You should see some dancing green bars at the bottom of the note
- Click these to open the transcription window, and you should see text appearing in grey
- Start speaking: you should see more transcription from your own voice in green
Restart Granola
This resets the connection to our transcription provider and often resolves connection issues.- Find the Granola ‘g’ icon in your dock (icon menu on the bottom of the screen) on macOS, or system tray (bottom-right of the taskbar under the ^ icon) on Windows.
- Right click the Granola ‘g’ icon
- Click “Restart Granola”.
Match system audio with your meeting audio
Granola uses your default sound devices (in macOS or Windows) to transcribe audio from your meeting, so these settings need to match the devices you’re using in Google Meet/Teams/Slack or any other virtual meeting software you’re using.macOS
On Mac, you can find the relevant settings under System Settings > Sound > Audio.- Output: Check that the device selected under the ‘Output’ tab is your actual speakers or headphones — not a USB microphone. Some USB microphones can appear as both input and output devices, and selecting one as your output device prevents Granola from capturing other participants’ audio separately. Make sure this matches the speaker selected in your meeting software.
- Input: Check that the microphone selected under the ‘Input’ tab is the same as the microphone selected in your meeting software. If you use an external microphone, select it directly rather than a virtual audio device.

Windows 11
In Windows 11, the settings are found under Settings > System > Sound. Granola looks for the output/input devices that are set as the default device, which you can pick using the circular button on the left. If separate devices are selected for default device and default communications device, Granola will use:- Output: Default device
- Input: Default communications device
Windows 10
In Windows 10, the settings are found under Settings > System > Sound > Playback. Granola will use:- Output: Default device
- Input: Default communications device
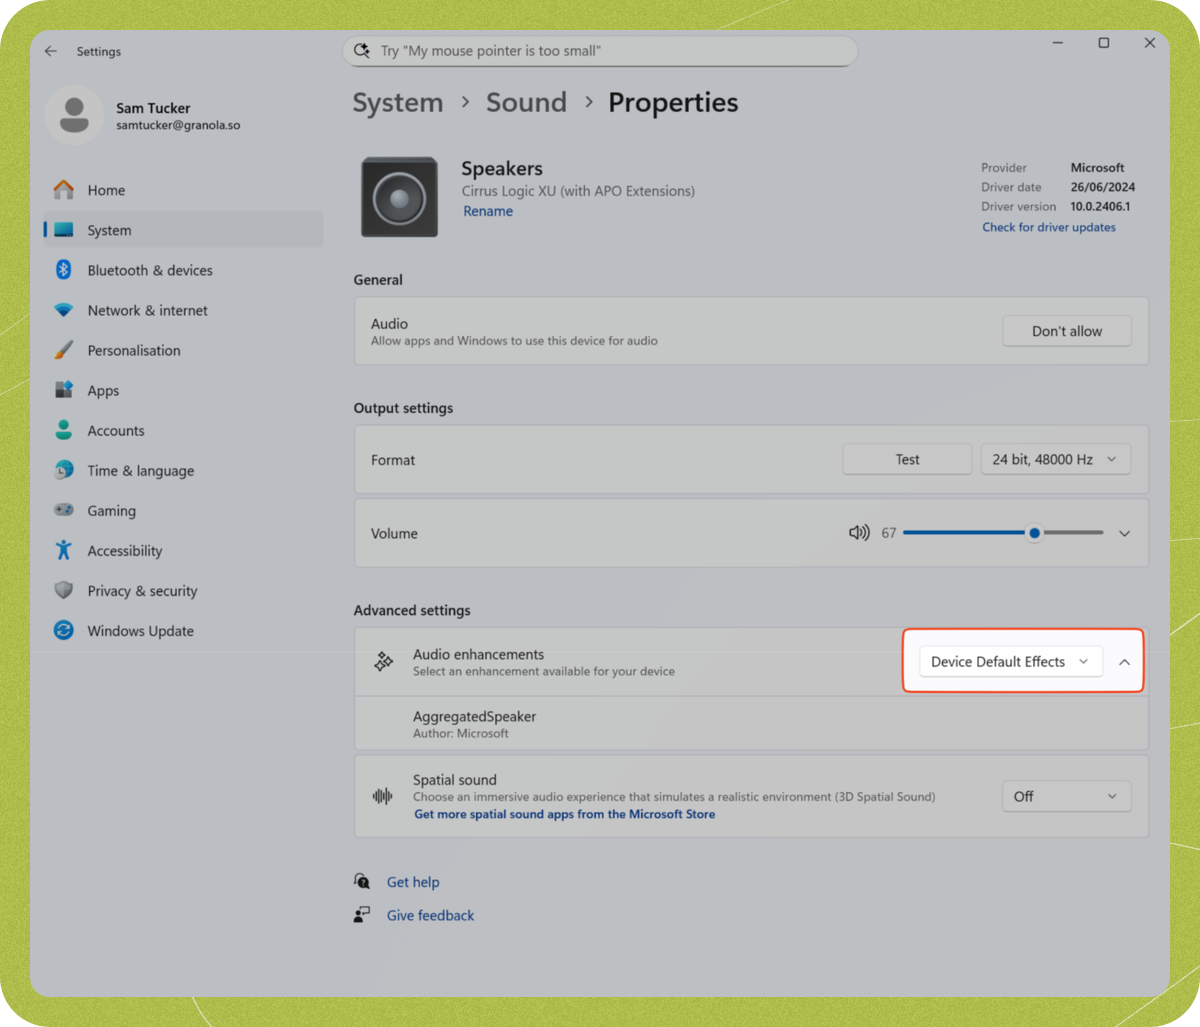
Turn off audio enhancement (Windows only)
Some audio devices also have settings that interfere with Granola, so we recommend turning these off.Windows 11
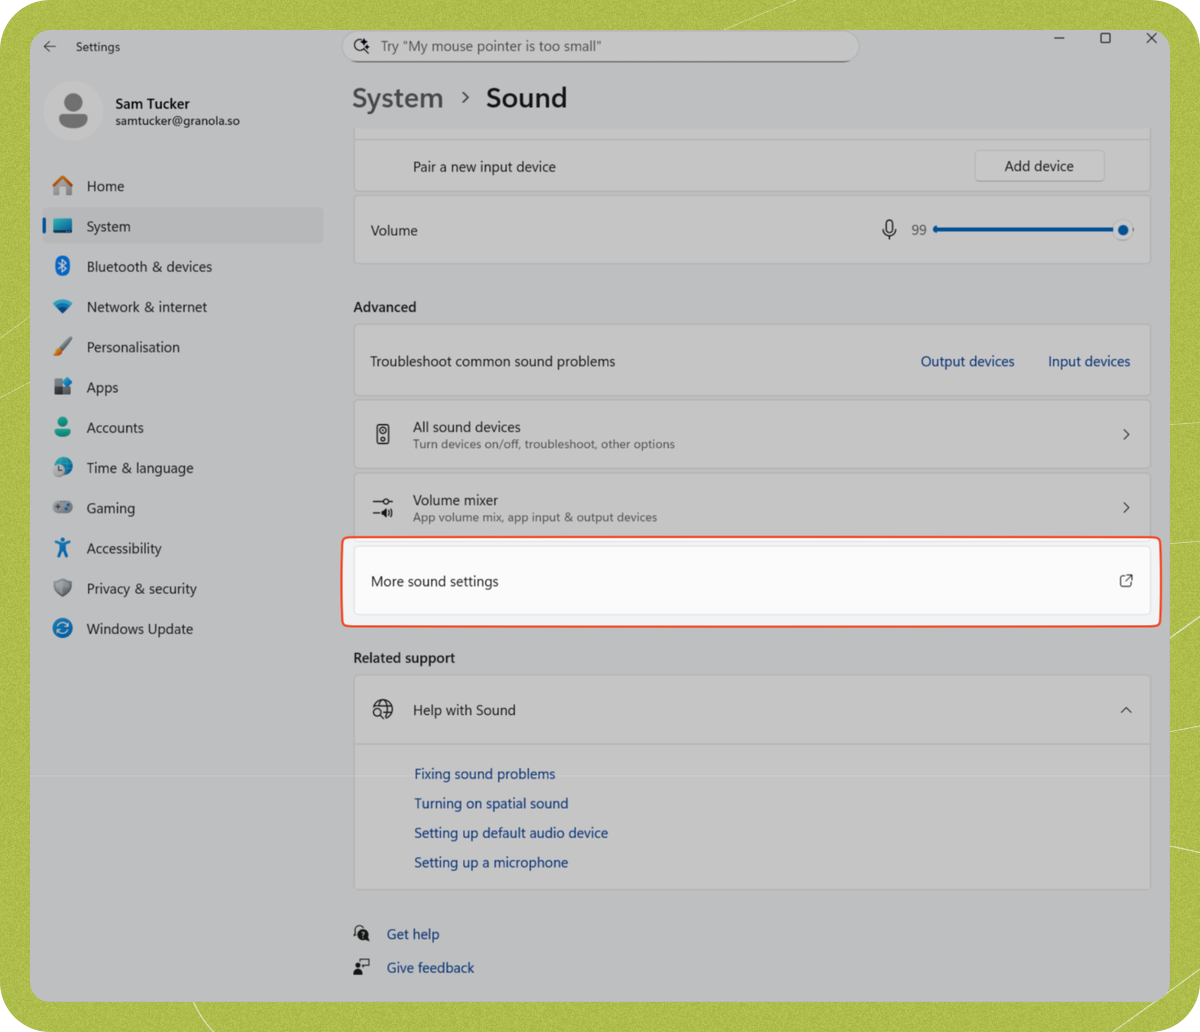
Open the sound settings by typing ‘sound settings’ into your Start menu or opening the Settings app and going to System > Sound. For each sound device, click the right arrow: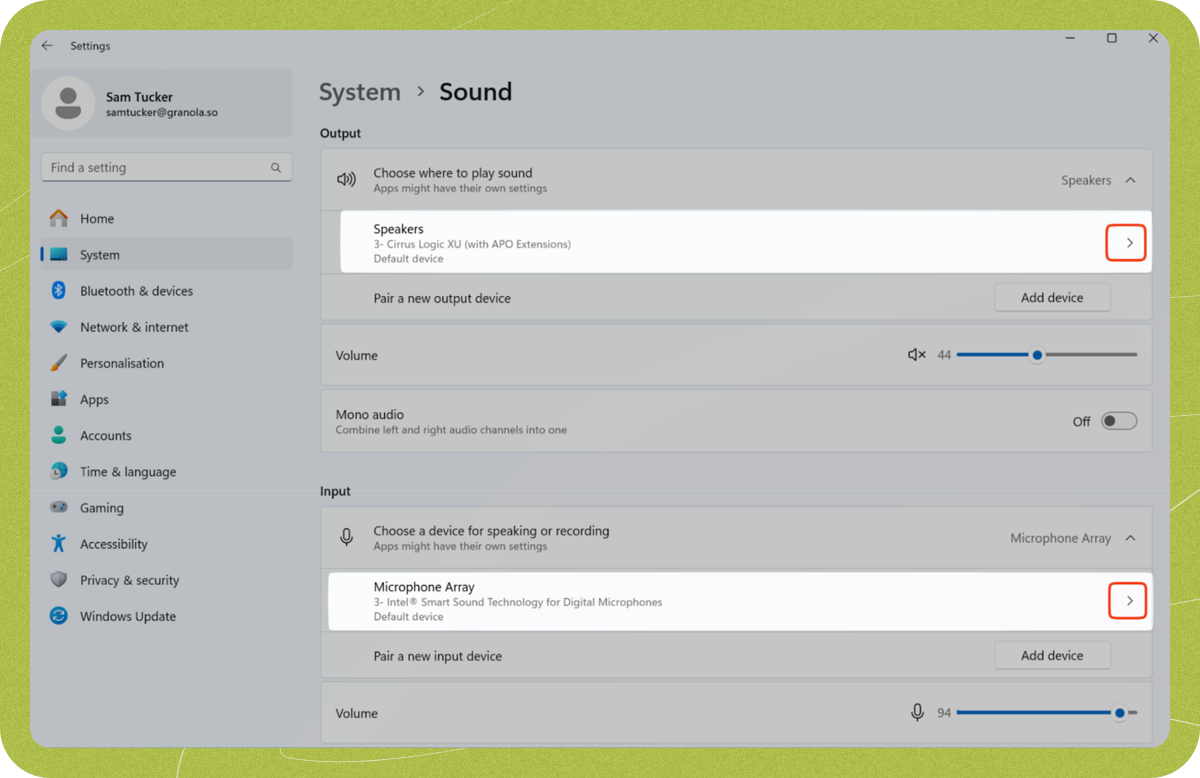
Windows 10
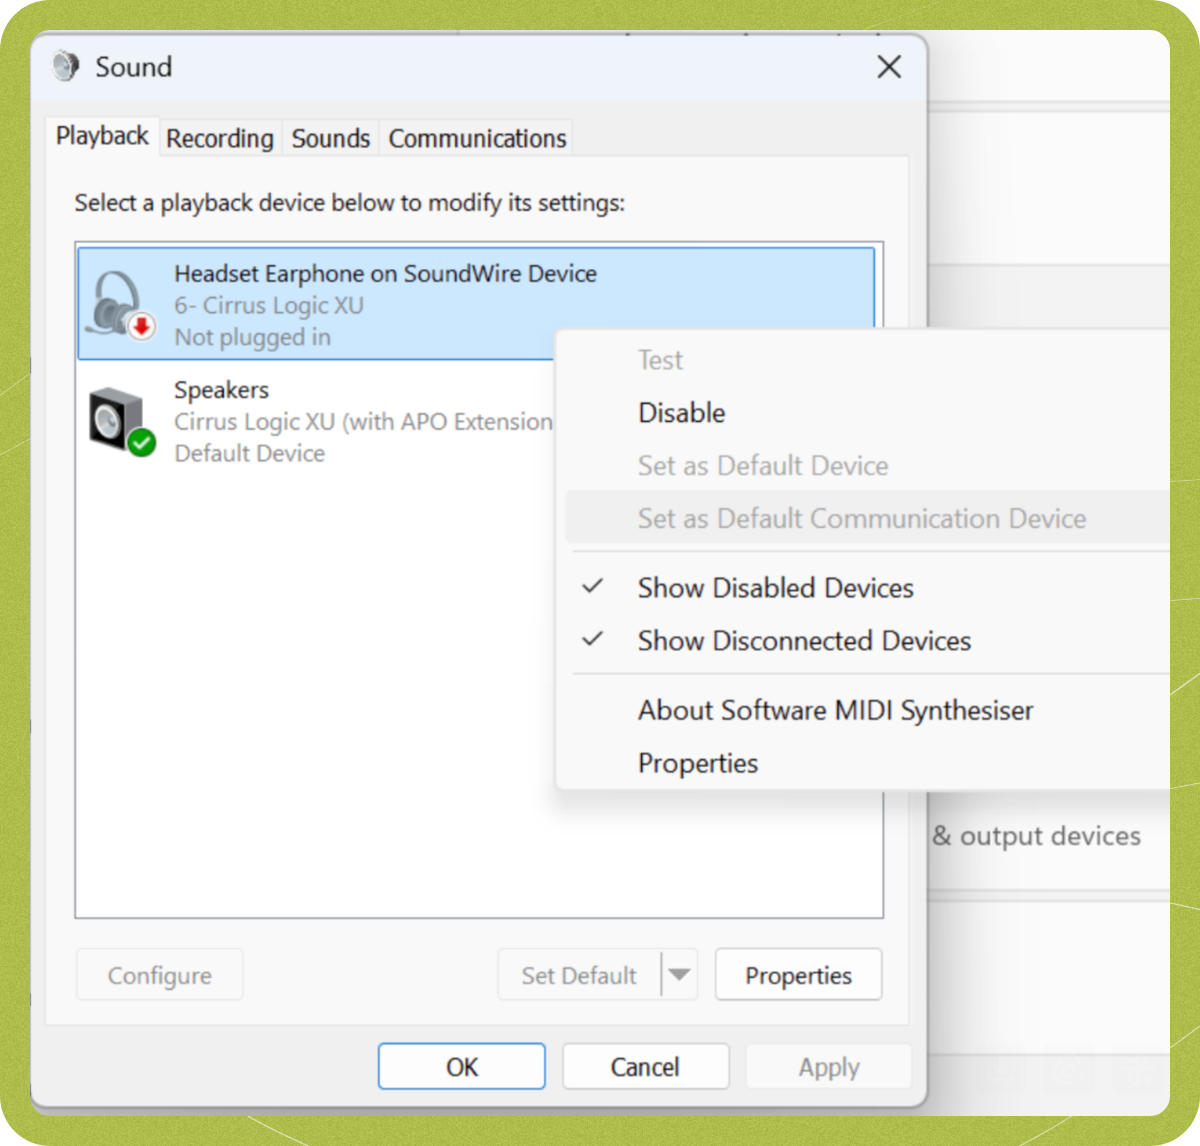
Type ‘sound settings’ into your Start menu and press enter to open the Sound control panel, or go to Settings > System > Sound > Playback. For each device you want to use, right click it and choose properties, then turn off ‘enable audio enhancements’ and click OK:
Check audio permissions
macOS
Make sure Granola has permission to access your system audio:- Open System Settings
- Go to Privacy & Security > Microphone
- Find Granola in the list and make sure it’s toggled on
- Repeat for Screen & System Audio recording
Windows
Make sure desktop apps are allowed to access your microphone:- Open Settings
- Go to Privacy > Microphone (on Windows 11: Privacy & security > Microphone)
- Make sure “Microphone access” is turned on
- Scroll down and make sure “Let desktop apps access your microphone” is turned on
Antivirus software (Windows)
Kaspersky
We’re aware that Kaspersky antivirus can block Granola’s access to audio devices, which prevents transcription from working. If you have Kaspersky installed and transcription isn’t working, you’ll need to add Granola to Kaspersky’s allow list. See Kaspersky’s guide on allowing application access to audio devices for steps on how to do this.Disable audio mixing software/hardware settings
Some hardware devices or software that add extra processing on audio can interfere with Granola - such as USB microphone amplifiers, or audio mixing software that combines audio from multiple microphone streams. If you’re not using any devices or software like this (you’d know if you were!) feel free to skip this section. If you try disabling or bypassing these, and Granola starts working, these may be the culprit. You may still be able to use these by checking the following things:- Disable any ‘pass-through’ options - this will turn a microphone input into both an input and output device, meaning that your microphone audio will be transcribed in Granola as though it was from others in your meeting.
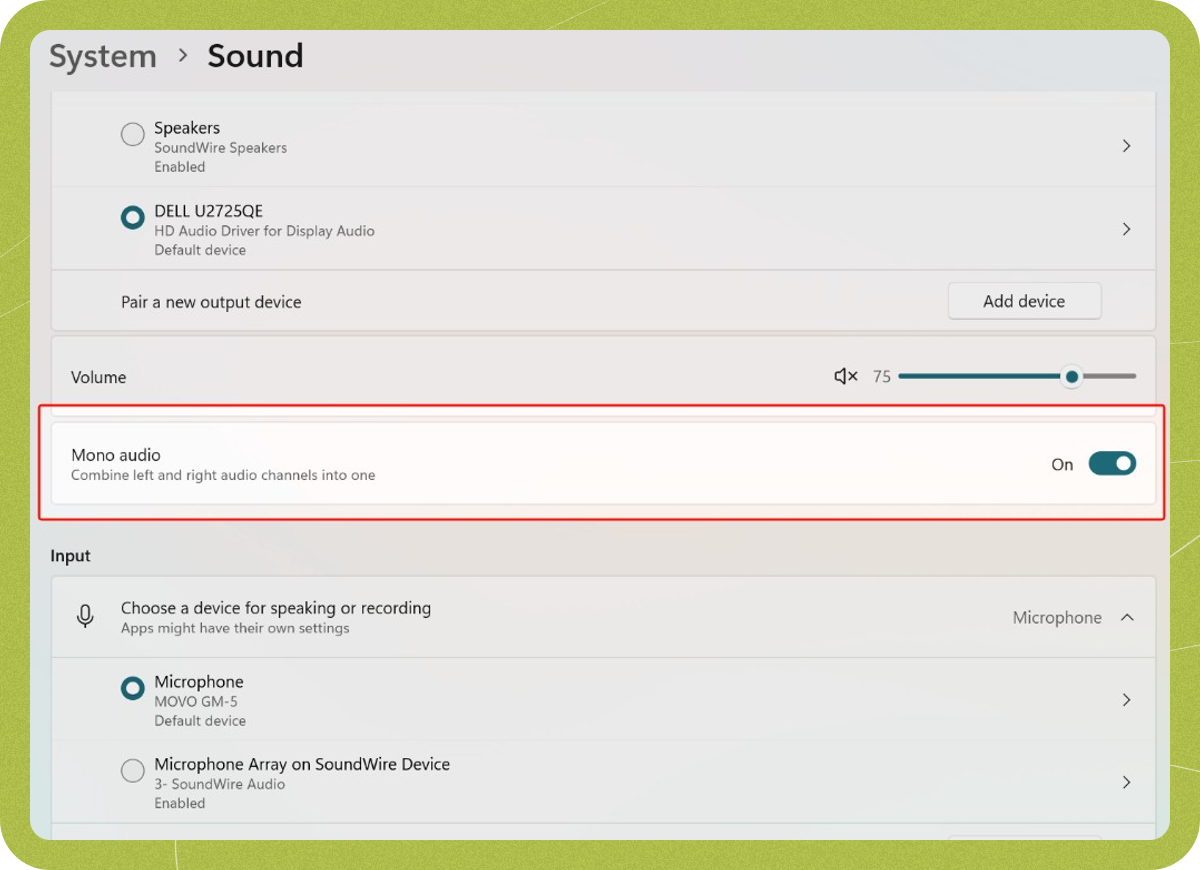
- For stereo inputs/outputs, make sure your input/output audio is sent to the Left channel (or both Left and Right). Granola expects mono audio, but if your audio devices are set to stereo then it will read the Left audio channel.
- Make sure any voice chat/microphones are routed to Granola as well as any call software
Virtual desktop environments (VDI / Citrix / AVD)
If you’re running Granola inside a virtual desktop session (such as Citrix, Azure Virtual Desktop, or another VDI platform), Granola may only capture your microphone — not system audio from other meeting participants. This means your own voice will be transcribed, but other participants’ audio may be missing. Workaround: Install and run Granola on your local machine instead of within the VDI session.Recording or transcription stops after a few minutes
If transcription starts but then stops (often reported around 4–5 minutes):- Sleep / idle — Granola stops when it doesn’t detect new audio for about 15 minutes, or when your computer goes to sleep. Keep the machine awake and ensure the meeting audio is actually playing through your default output device.
- Bluetooth / external audio — Some Bluetooth or USB audio devices drop out or stop streaming after a period. Try switching to built-in speakers and microphone, or a different external device, to see if the problem goes away.
- Restart Granola — Sometimes the connection to our transcription service drops. Right-click the Granola icon > Restart Granola, then open your note again and resume.
- If it keeps happening, note when it stops (e.g. “always around 4 minutes”) and contact hey@granola.so for help.
Restart your computer
Occasionally, the processes we use to transcribe system audio crash, and restarting Granola doesn’t fix this, but restarting your computer does, so try this if the steps above haven’t helped.Network troubleshooting
If Granola still isn’t able to transcribe after you’ve checked audio devices, permissions, and restarted the app, the issue may be your network, VPN, proxy, firewall, or web filtering software. See our Network troubleshooting and allowlist guide for:- the full list of domains your IT team may need to allow
- common symptoms when requests are blocked, redirected, or SSL-inspected
- quick checks like testing another network, disabling VPN, or checking DNS