

This guide is for Enterprise plan admins who want to enforce transparency features for everyone in their workspace. On a Free or Business plan? See user guide to set it up just for yourself.
1. Install the Granola Chrome extension onto employees’ browsers
Each workspace member needs the browser extension. Admins can deploy it automatically via Google Admin. You can roll it out to your entire organization, or scope it to specific teams using Organizational Units (OUs) or Google Groups. Add the extension- Sign in to your Google Admin console.
- Go to Devices > Chrome > Apps & extensions > Users & browsers.
- Click the + (plus) button in the lower right corner and choose Add from Chrome Web Store.
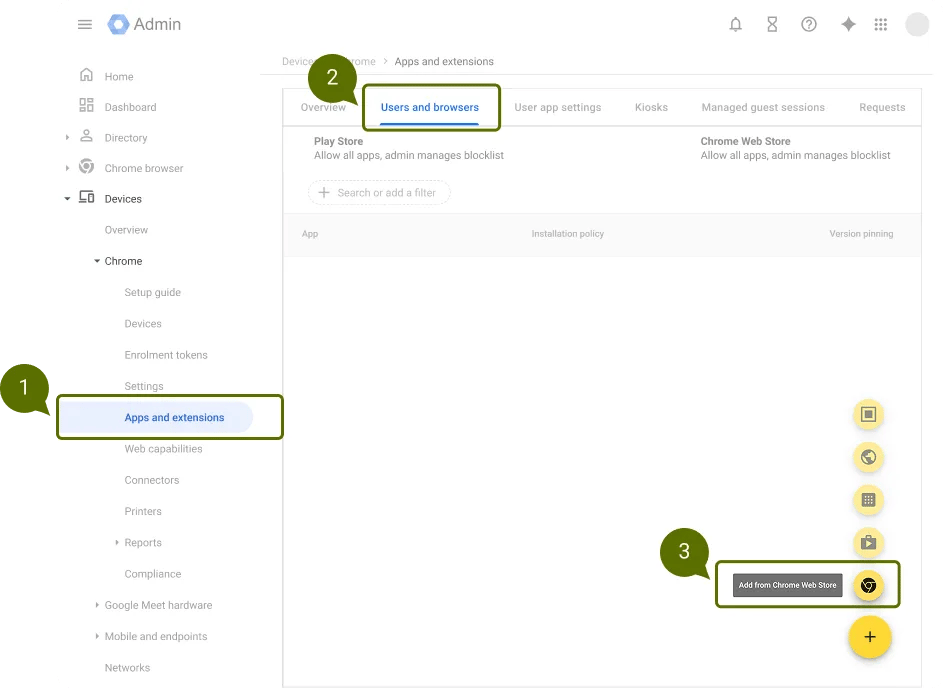
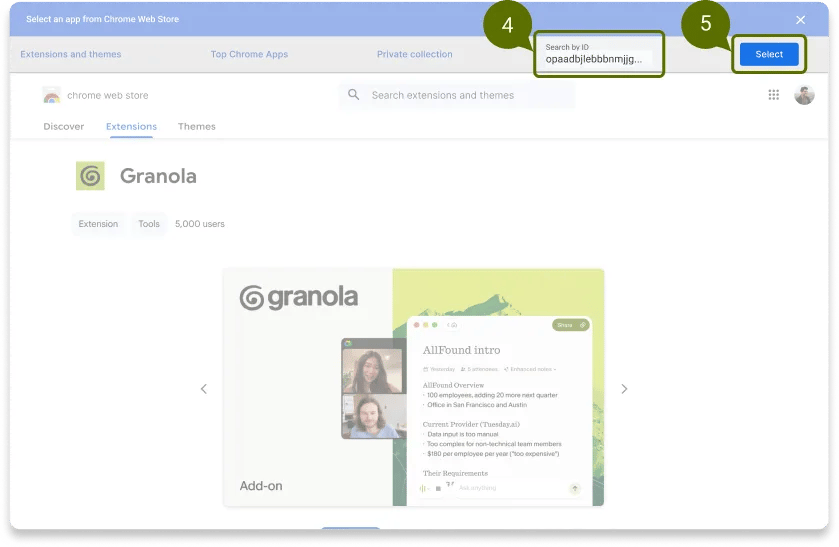
- Click Search by ID in the upper right and paste the extension ID:
opaadbjlebbbnmjjgdmdllingedoleml - Click Select to add the Granola extension.
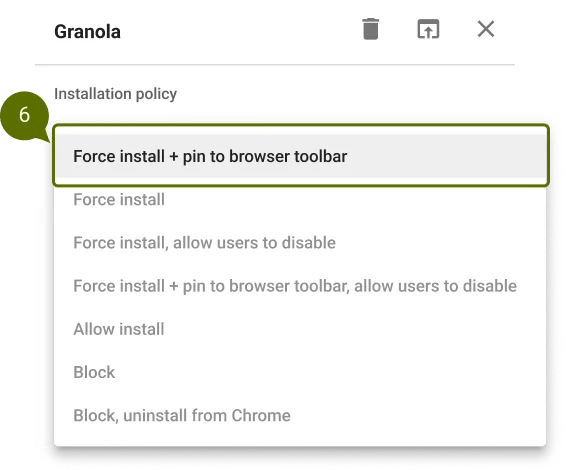
- Set the installation policy to Force install or Force install + pin to browser toolbar to ensure consistent deployment across your organization.
Option 1 — Organizational Units (OUs)
Option 1 — Organizational Units (OUs)
Organizational Units let you group users by department, location, or any other criteria and apply policies to each group independently.
- In the Google Admin console, go to Directory > Organizational units.
- If you don’t already have an OU for the target group, create one.
- Move the relevant users into that OU.
- Go to Devices > Chrome > Apps & extensions > Users & browsers.
- In the left sidebar, select the OU you want to target (instead of the top-level organization).
- Add or configure the Granola extension for that OU. Only users in the selected OU will receive the installation.
Option 2 — Google Groups
Option 2 — Google Groups
If restructuring your OUs isn’t practical, you can target installation via a Google Group instead. This is useful when users span multiple OUs (e.g., a cross-location team).
- In the Google Admin console, go to Directory > Groups.
- Create a new group (or use an existing one) containing the users who should receive the extension. For example,
granola-users@yourcompany.com. - Go to Devices > Chrome > Apps & extensions > Users & browsers.
- In the left sidebar, search for and select the group you want to target.
- Add or configure the Granola extension for that group. Only members of the group will receive the installation.
The extension requires Google Chrome or another supported Chromium browser (Edge, Arc, Brave).
Automated force-install through Google Admin applies to Google Chrome. Members on other supported browsers (Edge, Arc, Brave) may need to install the extension manually from the Chrome Web Store.
2. Allow the message to be pinned
When Continuous Meeting Chat is enabled, the consent notice cannot be pinned. To allow pinning for maximum visibility, disable it:- Sign in to the Google Admin console.
- Go to Apps > Google Workspace > Google Meet.
- Click Meet safety settings.
- Find the Continuous meeting chat setting.
- Select Default off — Hosts cannot modify (recommended).
- Click Save.
This setting applies to your entire Google Workspace organization by default. You can scope it to the same Organizational Unit (OU) or Google Group you used to deploy the browser extension.
3. Enable automated chat messages for your workspace
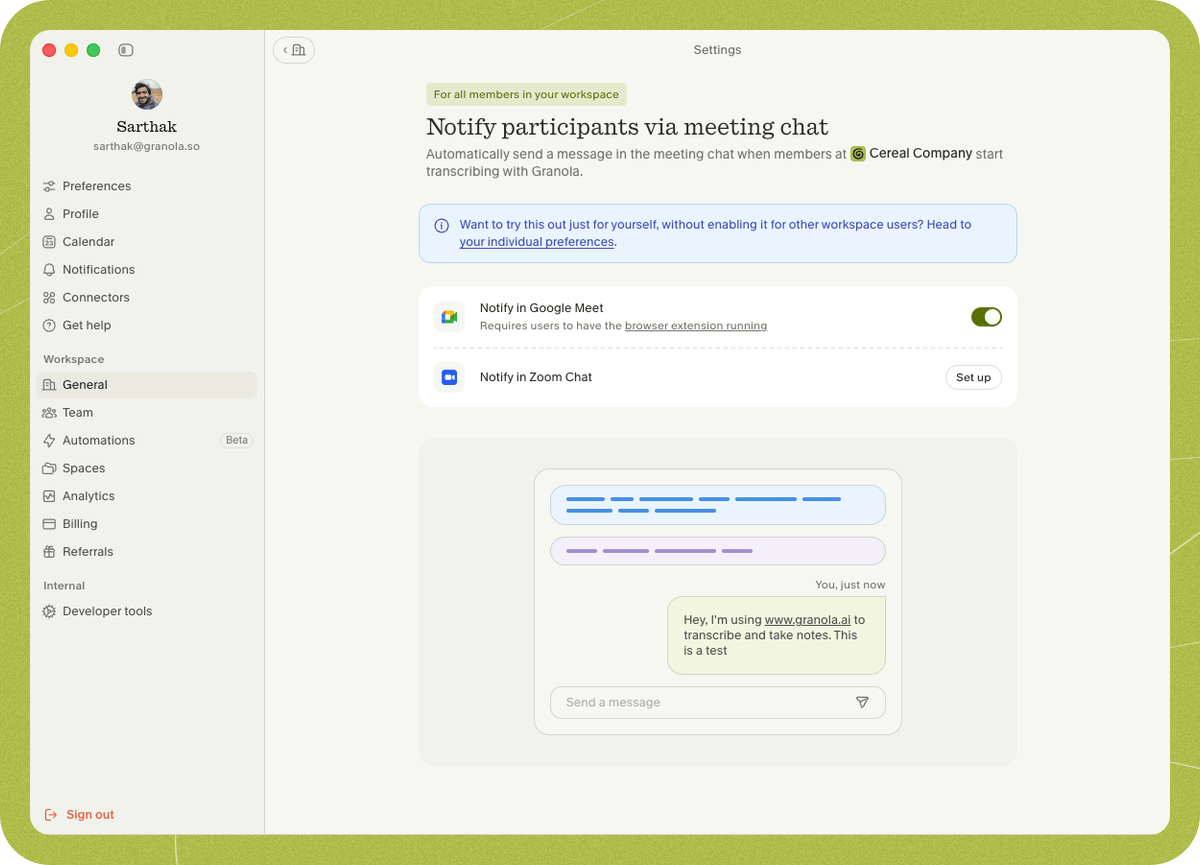
- Open Settings > Workspace > General > Notify participants in meeting chat.
- Find Notify in Google Meet and click Set up.
- Complete the setup, then click Enable for all workspace users to turn it on for everyone.
Things to know
- Late joiners: Participants who join after the message was sent will still see it on desktop (via the pinned message). Late joiners on mobile may not see pinned messages due to Google Chat limitations.
- External participants: Depending on the meeting’s chat configuration, participants from outside your organization who join late may not see the chat message.
- Continuous Meeting Chat: If Continuous Meeting Chat is still enabled, the notice will be sent but will not be pinned. See Allow the message to be pinned above.
FAQs
How often is the message sent?
How often is the message sent?
The notice is sent once per meeting — members won’t see duplicate messages if they briefly leave and rejoin.
Does the browser extension access my meeting content?
Does the browser extension access my meeting content?
For the in-meeting notice, the browser extension only sends the message — it doesn’t access meeting audio, video, or transcripts. (If your workspace also uses Google Meet speaker attribution, the extension reads active-speaker and participant-name data for that feature.)
Which browsers are supported?
Which browsers are supported?
The browser extension currently requires Google Chrome. Other Chromium based browsers (Edge, Arc, Brave) are supported; other browsers are not.
Can workspace members turn this off?
Can workspace members turn this off?
No. When an admin enables the notice for the workspace, members can’t disable it as long as the Granola Chrome extension is installed in their browser.
Does this work for other video conferencing apps?
Does this work for other video conferencing apps?
Yes — Granola can also post the notice in Zoom. Support for more apps is coming.
I still need help
I still need help
Contact us at hey@granola.so and we’ll be happy to help.