> ## Documentation Index
> Fetch the complete documentation index at: https://docs.granola.ai/llms.txt
> Use this file to discover all available pages before exploring further.
# Set up SSO and SCIM
> Set up single sign-on and directory sync for your Enterprise workspace, test sign-in, and manage access through your identity provider.
SSO and SCIM are available on the **Enterprise** plan only.
Use single sign-on (SSO) to let your team sign in through your company's identity provider. Add directory sync (SCIM) to manage workspace members and groups from the same place.
Set up SSO first. You can then choose whether to require SSO for sign-in and whether to add directory sync.
## Before you start
You'll need:
* An **Enterprise** workspace and **workspace admin** access in Granola.
* At least **50 active workspace members**, or an Enterprise subscription with a minimum commitment of **50 seats**.
* A company email domain, such as `yourcompany.com`. Personal domains, such as `gmail.com`, cannot be used for SSO setup.
* Admin access to your identity provider, such as Okta or Microsoft Entra ID. Ask your IT admin to help if needed.
* The **Google** or **Microsoft** account provider your team uses for email and calendars.
If you see **Contact us**, use that button to request setup.
## Set up SSO
SSO applies to your whole company email domain.
If your company uses multiple internal email domains, contact Granola support
at [hey@granola.so](mailto:hey@granola.so) to configure SSO for you.
1. In the Granola desktop app, switch to the workspace you want to configure.
2. Open [Settings > Workspace > General](https://grano.la/app?path=%2Fsettings%2Fworkspace).
3. Under **Workspace invites & members**, click **Set up** beside **SSO**.
4. If prompted, choose **Google** or **Microsoft** for your team's email and calendars. You'll choose your SSO identity provider separately in the setup portal.
5. In the browser portal, select your identity provider and follow its setup instructions. The portal guides you through the values to copy between Granola and your provider.
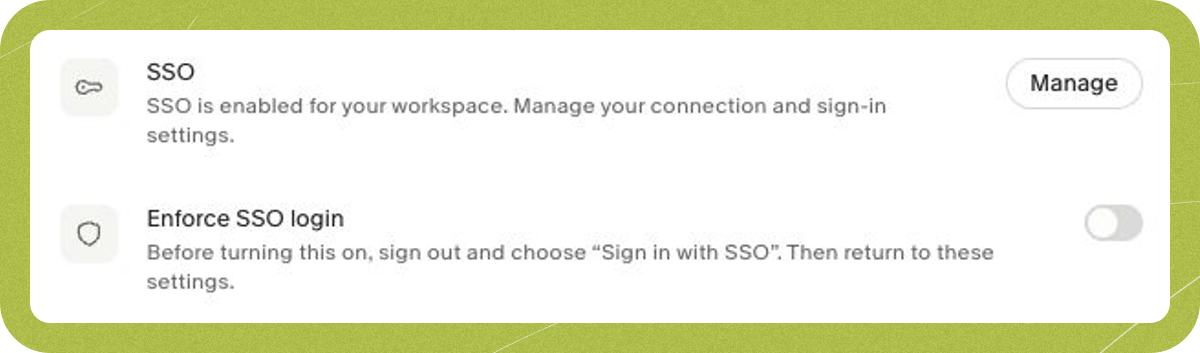
6. Complete the connection setup, then return to Granola. Reopen workspace settings to check the result.
 ### Test sign-in
1. Assign your own account to Granola in your identity provider.
2. Sign out of Granola, then choose **Sign in with SSO**.
3. Enter your work email and complete your provider's sign-in steps.
4. Connect your [Google or Microsoft calendar](/help-center/signing-in-and-connecting-your-calendar) if prompted.
5. Check that you can access the correct workspace and your notes.
### Require SSO for your team
First, make sure everyone who needs access is assigned to Granola in your identity provider. Test sign-in before changing this setting.
After you have signed in with SSO, return to **Settings > Workspace > General** and turn on **Enforce SSO login**. Workspace members must then use your identity provider instead of signing in directly with Google or Microsoft.
If the switch is unavailable, read the message below it. You may need to finish the connection setup or sign in with SSO once yourself.
## Set up directory sync (SCIM)
Directory sync creates and updates workspace members from your identity provider. When a synced user is deactivated or removed from the directory, Granola removes their workspace membership. [Groups](/help-center/sharing/user-groups) can also sync for sharing Spaces and folders.
You'll need an active SSO connection and a provider that supports directory sync.
1. Open [Settings > Workspace > General](https://grano.la/app?path=%2Fsettings%2Fworkspace).
2. Under **Workspace invites & members**, click **Set up** beside **Directory sync**.
3. Select your directory provider in the browser portal and follow its instructions. For SCIM connections, copy the endpoint and token into your provider as directed.
4. Assign the users who need Granola access. Include existing Granola users so your provider can manage their membership too.
5. If you want to sync groups, configure group syncing in your provider. In Okta, use **Push Groups**.
6. Return to Granola. It can take a few minutes for users and groups to sync.
7. Check **Settings > Members** for synced users and **Groups** for synced groups.
### Test sign-in
1. Assign your own account to Granola in your identity provider.
2. Sign out of Granola, then choose **Sign in with SSO**.
3. Enter your work email and complete your provider's sign-in steps.
4. Connect your [Google or Microsoft calendar](/help-center/signing-in-and-connecting-your-calendar) if prompted.
5. Check that you can access the correct workspace and your notes.
### Require SSO for your team
First, make sure everyone who needs access is assigned to Granola in your identity provider. Test sign-in before changing this setting.
After you have signed in with SSO, return to **Settings > Workspace > General** and turn on **Enforce SSO login**. Workspace members must then use your identity provider instead of signing in directly with Google or Microsoft.
If the switch is unavailable, read the message below it. You may need to finish the connection setup or sign in with SSO once yourself.
## Set up directory sync (SCIM)
Directory sync creates and updates workspace members from your identity provider. When a synced user is deactivated or removed from the directory, Granola removes their workspace membership. [Groups](/help-center/sharing/user-groups) can also sync for sharing Spaces and folders.
You'll need an active SSO connection and a provider that supports directory sync.
1. Open [Settings > Workspace > General](https://grano.la/app?path=%2Fsettings%2Fworkspace).
2. Under **Workspace invites & members**, click **Set up** beside **Directory sync**.
3. Select your directory provider in the browser portal and follow its instructions. For SCIM connections, copy the endpoint and token into your provider as directed.
4. Assign the users who need Granola access. Include existing Granola users so your provider can manage their membership too.
5. If you want to sync groups, configure group syncing in your provider. In Okta, use **Push Groups**.
6. Return to Granola. It can take a few minutes for users and groups to sync.
7. Check **Settings > Members** for synced users and **Groups** for synced groups.
 Manage synced users and groups in your identity provider. You cannot remove directory-synced workspace members manually in Granola, or edit synced groups there.
### Control who can join
Check **Allow teammates to join automatically** in the same settings section. If it stays on, people with your company domain can join without being assigned through directory sync. Turn it off if your identity provider should control who joins.
### Check setup problems
* **No Directory sync setup button:** Confirm that SSO is active and you are an Enterprise workspace admin.
* **A user or group is missing:** Check its assignment and provisioning status in your provider. Existing Granola users also need to be assigned. In Okta, check **Push Groups** for missing groups.
* **The domain already has SSO:** Another workspace may already use that domain. Ask your Granola contact to help resolve the existing setup.
Manage synced users and groups in your identity provider. You cannot remove directory-synced workspace members manually in Granola, or edit synced groups there.
### Control who can join
Check **Allow teammates to join automatically** in the same settings section. If it stays on, people with your company domain can join without being assigned through directory sync. Turn it off if your identity provider should control who joins.
### Check setup problems
* **No Directory sync setup button:** Confirm that SSO is active and you are an Enterprise workspace admin.
* **A user or group is missing:** Check its assignment and provisioning status in your provider. Existing Granola users also need to be assigned. In Okta, check **Push Groups** for missing groups.
* **The domain already has SSO:** Another workspace may already use that domain. Ask your Granola contact to help resolve the existing setup.